

Waterfall Paper bag album
This Waterfall paper bag album is just another spin on the already popular paperbag album. A great idea if you want a change from the normal paperbag album . Just follow these kinda simple directions to make one for yourself.
The example below uses only 2 paper bags and will create an album with 4 different length pages.
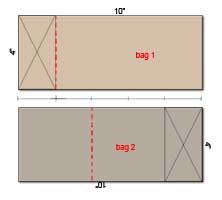
| 1. Take your paper bag and measure the length. This example
uses bags 10" long. divide the length by 5. This will give us the width of
the first page which will be 2" for my example.
length 10" / 5 = 2"
|
|
|
|
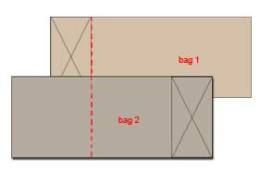
Lay the 2nd bag on top of the first bag keeping the folds aligned. |
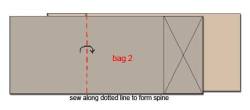
| Carefully sew along the Crease to form the spine of the album. |
|
|
|
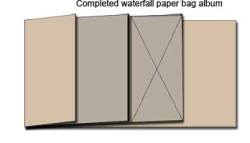
Once you have sewn your spine your waterfall paper bag album
should look something like this album in the diagram. Embellish pages as you
wish. You can punch holes along the spine and bind with ribbon or book rings. |
Tips
These instructions assume you want an equal distance between pages. If you are not to fussy about page length then don't worry to much where you put your folds.
3 bag album
If you are going to use 2 bags, divide the length of the bag by 5 for even spacing
If you would like to use three bags just divide the length of the bag by 7
five bags: divide length by 9 and so on.
Buy a blank paper bag mini book ready for you to decorate on Ebay!!
All the hard work is done so that all you need to do is embellish them.
Return from waterfall paper bag album to see other paper bag album instructions