

Stand Up Purse Paper Bag album Instructions
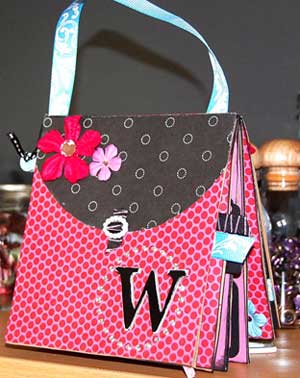
These instructions are to make this stand up purse paper bag album. It is very similar to the regular paper bag album with only a couple of differences which I will cover shortly.
As with the popular paper bag album all you need to make this nifty purse are at least 3 paperbags. It is a good idea to only use 3 paperbags for your first purse. Later on if you're feeling adventurous you can give it a go with more (or less) paper baggies. So grab your supplies and lets get busy.
Materials:
- 3 paper bags
- Sewing machine
- Scissors or craft knife
- Double sided tape
- Paper and Pretties to embellish
Because the final product will be an album standing on it's side, we are going to have to do one of two things to make use of the 3 deep pockets created by each of the folded bags. Keep in mind that the pockets are one of the highlighting features of a paper bag album.
Keep the bottom pockets
We can leave the pockets as they are. When the album is standing the pocket openings will be face down to the surface it is standing on. This may not be a big deal as the tags in the pockets will not easily slip out if they are large enough.
Make Side Pockets
If on the other hand you would like your tags to stick out the side of the purse as it is on display (this would be a good idea if you want bits of ribbon to stick out the sides) we will need make a couple of small adjustments to each bag in the album so that the openings are on the side when the album is propped up in standing position. Follow the simple instructions below to achieve this effect.
|
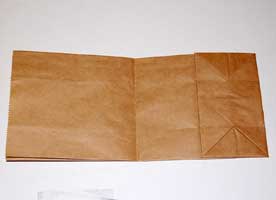
1. Take your first paper bag and fold it in half. |
|
|
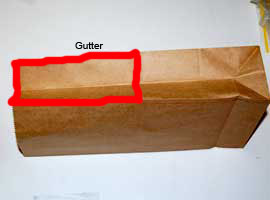
2. Open up the bag. What we want to do is cut out the gutter part on both sides of the bag, but only to where the bag folds in half. If your bag does not have gutters then you will only need to cut down
one side of the bag to the half way point. |
|
|
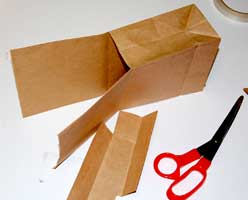
3.Use your scissors to remove the gutters. |
|
|
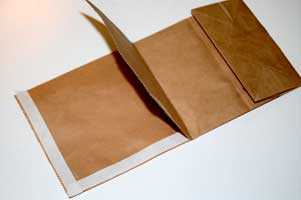
4. Flatten the bag again then place two strips of double sided tape along the edges as shown in the diagram |
|
|
5. Tape the bag together. |
|
|
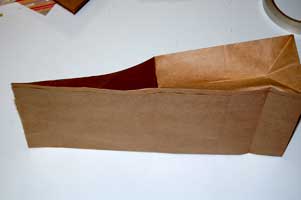
>6. There we have one finished bag with a side pocket. Repeat steps 1-6 for the remaining two bags. |
|
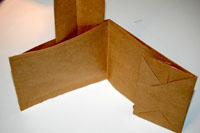
Assemble the Purse
Now we have our bags as we want them you can simply lay the bags on top of each other alternating the ends. Then machine sew the spine for reinforcement. We will not be punching holes along the spine for this album so the machine stitching will be the only thing holding it together so make sure you do a good job.
Attaching the ribbon handle
I attached this ribbon handle by using double sided tape to stick it to the back cover of the pre-assembled album (make sure that the back cover is not the pocket end of the bag) Before I embellished the album I machine stitched the ribbon to reinforce it. Once I had made my back cover (which was just patterned paper) I covered it with an even coating of glue and stuck it on over the top of the ribbon so that the end pieces would not show.
If you want you can adhere your back cover to the album first and then attach the ribbon and machine stitch it.
You can also use chipboard or wire with beads or maybe a wooden or acrylic purse handle from your local craft store.
Embellish your Purse Album
To embellish your purse album I would suggest that you:
- Measure the size of your front cover. For this example lets say it measures 5"x 6" (width x height)
- Make the front and back covers 5"x6"
- Make the inner pages 5" x 5 7/8" so that you have no problems opening and closing the album.
I like to trim and create all my pages before I stick them to the album but you can create each page stick em as you go. I usually sketch out an outline of my 10 inner pages on a piece of scrap paper before I start so that I have a clear outline of what I am going to do with each page - this saves me a lot of time in the end. I always end up with all twelve pages laid out before me on my dining/scrapbook table and once I've finished tweaking an are satisfied with the overall look then I adhere each page into the album.
I attach my pages to my album with either double sided tape, regular white glue (pva) or a glue stick. But my first preference is an even coating of pva glue.
Tip
Add buckles or clasps to the cover to give your album the look of a real purse.
Return from purse paper bag album instructions to paper bag albums