

 Mini Backpack Album Tutorial
Written by Deena Perreault
This very creative mini backpack album tutorial comes from Deena Perreault, who is a stamping and card making diva. We are so lucky to have such a crafty person of Deena's caliber share her fabulous mini scrapbook idea with us. Deena's blog A Creative Need is chocka block filled with card making and craft inspiration and she also has an Etsy store filled with crafty supplies and handmade cards.
I really enjoy making mini albums that reflect the time of year were in, or coordinate with an event in our lives. In this case, as our children get back into the routine of school, meeting new (and old) friends, and looking forward to class field trips, I thought a mini backpack album would be a fun way to share and showcase some photos.
The double front pockets are perfect for tucking in some small notes, or folded ticket stubs etc. The pages have room for up to 8 standard wallet sized photos. Wouldnt these make fun school commencement gifts for students to fill with their favourite summer photos, or with new classmate photos and memorable happenings through the year?
Materials:
- 11" x 3" strip of sturdy card stock for the backback frame
- 11" x 2 3/4" strips (x2) of card stock for inside album pages
- 4" x 2 1/2" decorative papers (inside album pages)
- 3" x 2 3/4" piece of sturdy decorative paper or paper covered card stock (top flap)
- 5" x 5" square decorative paper (pocket) NOT card stock
- 2 1/4" x 2 1/4" square card stock (pocket top flap)
- 2 brads
- 2 strong mini magnets
- 4 eyelets
- 2 pieces of Ribbon 8 length
- adhesive, crop a dile or eyelet setter, scoring tool
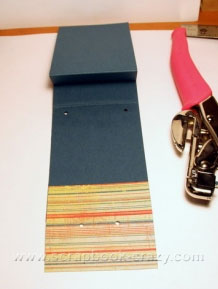
Backpack Frame Assembly
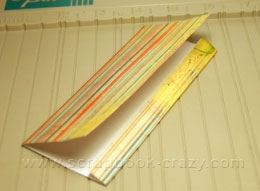
| 1.
Score 11" strip at 4 1/2", 5 1/2", and 6 1/2" Crease and fold up the center to
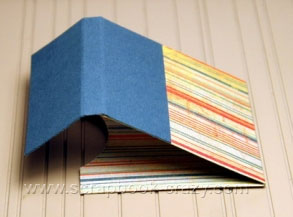
create a tent fold. (see photo) 2. Score top flap piece (3" x 2 3/4") at 1 1/4", and 1 1/2" 3. Adhere to top back of backpack to create flap closure
|
|

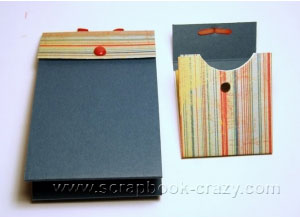
Front Pocket Assembly
| 1.
Score 5" x 5" square at 1/2" in on one end so you have a 5" x 4.5" piece. Score
at 2 1/4" (center) and fold in half adhering top edge to folded 1/2" edge.
|
|
| 2. Fold in half (upwards) to create a double pocket. Using a circle punch, punch through top 4 layers to create a semi circle opening in both pockets. |
|
| 3. Score 2 1/4" x 2 1/4" pocket flap at 1", and 1 1/4". Adhere flap piece to top back of pockets. |
|

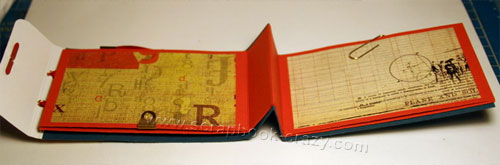
Inside Page Assembly
1. Score 11" x 2 3/4" strips at 4 1/2", 5 1/2" and 6 1/2". Trim the short
ends by 1/8" for a better fit inside frame.
2. Adhere center tent folds to frame tent fold.
3. Adhere decorative pieces (4" x 2 1/2") to the page inserts and add your own
embellishments and photos etc.

Final Assembly
1. Place brads on lower front of flaps. Line up with mini magnets and adhere the
magnets to the main frame and pockets.
2. Set 2 eyelets in top flap of backpack 1" apart. Set other 2 eyelets at the
bottom of backpack 2" apart.
3. Thread the ribbons through and knot on inside to secure, for backpack straps.
4. Adhere double pocket to front of backpack
Here is the finished view
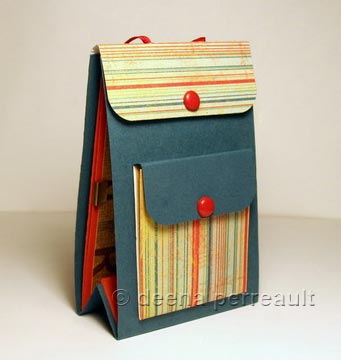
Fabulous, fabulous, fabulous! Thanks so much Deena for sharing your amazing
talents and backpack scrapbook with us. We hope to see more mini album inspiration from you in the
future! Check out
Deenas Blog for more inspiring ideas and how to's.
Return from this mini backpack album to see more bag and purse mini scrapbooks