Make a Calendar from Chipboard
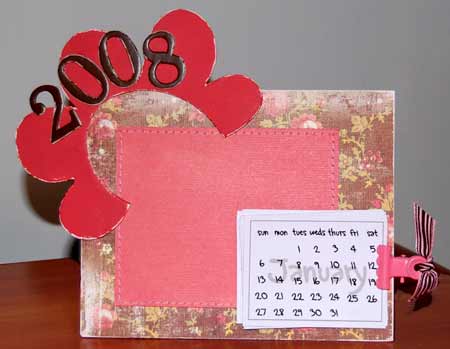
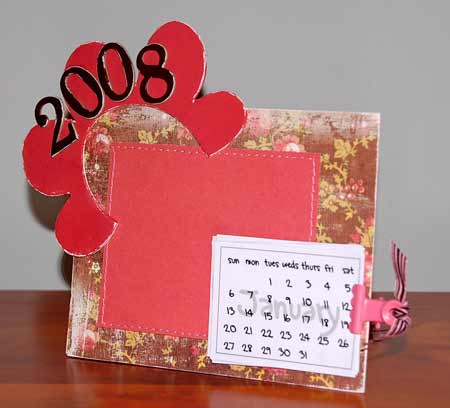
| Chipboard is used for anything so I figure why not make a calendar with it. This is the end result. I am quite pleased with how it turned out. It was really quite quick to put together and I managed to use my 2008 scrapbook calendar template that I put together for the August newsletter. |
2008 Scrapbook Calendar
How to make a chipboard calendar
Supplies
-
2 pieces of chipboard measuring 4.5" x 5.5" (you can make it any size.
-
paper trimmer
-
craft knife
-
double sided tape
-
piece of 4.5" x 5.5" patterned paper for the background
-
piece of 4"x3.5" cardstock for the photo mat
-
Chipboard embellishments
-
patterned paper or paint to cover chipboard embellishments
-
paper clip (i used a making memories clip)
-
Numbers - either chipboard or stickers or rubons.
-
Sandpaper to distress the edges
Templates
Prepare the calendar base
1. Cover the first piece of chipboard with patterned paper of your choice.
2. Distress the edges by sanding lightly with sandpaper
3. Attach the photo mat to the chipboard a little of centre and to the left.
4. Embellish the base as you wish. With this calendar I chose to add a little more interest by painting a chipboard embellishment with co-ordinating acrylic paint and attach it with double sided tape
I also glued the numbers 2008 to my embellishment with glossy accents. I also distressed the edges of the numbers with a light sanding.
Create a stand
5. The trickiest part of making this project was cutting out the stand. But it didn't turn out to be too difficult. Thank goodness.
Print out the 4.5"x5.5" calendar stand template and trace it on to the 2nd piece of chipboard. Use a craft knife to cut along the solid lines and score a fold along the dotted line. Adhere it to the back of the embellished base with a glue stick or double sided tape.
Print the calendar
6. Print off the calendar on to regular printer paper. Do not use thick cardstock or else you will not be able to clip it to the chipboard. You can use patterned paper if you wish.
Trim each month of the calendar and clip them to the base with a bull dog clip or stationary clip.