

How to make a Mini Scrapbook with a Cardstock Tri Fold
Written by Amy Manhart
 This
how to make a mini scrapbook tutorial comes to us from Amy Manhart. She is the
creative genious behind the blog Wuns Upon A Time.
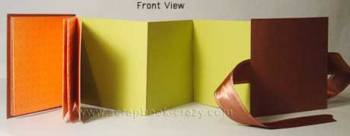
It was inspired by the American Girl books being given out with
McDonald's happy meals. It has a tri-fold section in the middle with places for
photos on each side, a little booklet section in the front and a pocket in the
back to tuck in little mementos. In all there are 17 areas for mounting photos
or journaling.
This
how to make a mini scrapbook tutorial comes to us from Amy Manhart. She is the
creative genious behind the blog Wuns Upon A Time.
It was inspired by the American Girl books being given out with
McDonald's happy meals. It has a tri-fold section in the middle with places for
photos on each side, a little booklet section in the front and a pocket in the
back to tuck in little mementos. In all there are 17 areas for mounting photos
or journaling.
How to make a Mini Scrapbook Materials:
- 3 3/4" x 12" card stock (tri-fold center)
- 2 - 4" x 4" card stock (front & back covers)
- 3 3/4" x 3 3/4" card stock (inside back cover)
- 3 3/4" x 3 3/4" decorative paper (front cover)
- 3 - 3 3/4" x 7 1/2" decorative paper (booklet)
- 1/2" x 5 1/4" decorative paper (pocket)
- 24" Ribbon
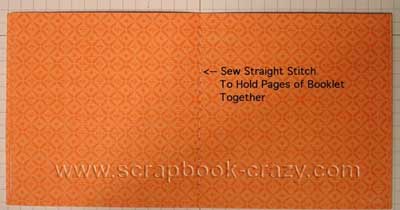
Booklet Assembly
NOTE: You may need to remove a smidge of paper from the inside pages in order to line them up properly when the booklet is closed. Set aside. |
|
|
Step 2:Tri-fold center - Score the 3 3/4" x 12" card stock at 4 1/4"; 8"; and 11 3/4"; turn the card stock and score at 11 5/8" and 11 3/4" from the other end. Fold at all the score lines. Set aside. |
|
|
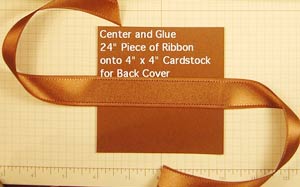
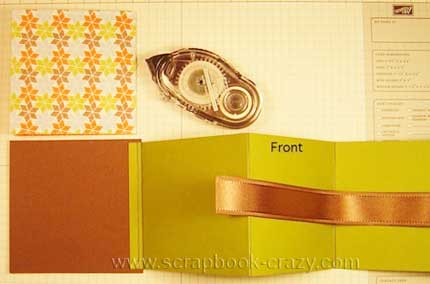
Step 3:Center and glue a 24" piece of ribbon to one of the 4" x 4" pieces of card stock. This will become the back cover. |
|
|
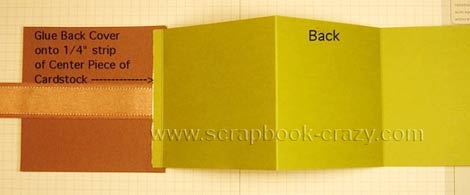
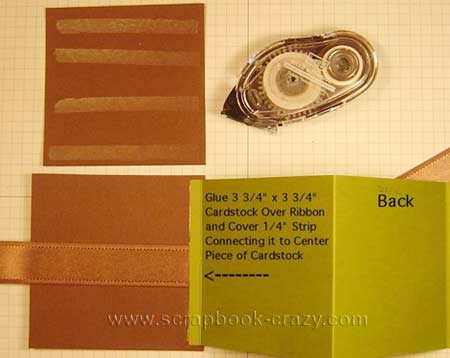
Step 4:Use a piece of sticky strip to attach the back cover to the tri-fold center as shown in the picture. |
|
|
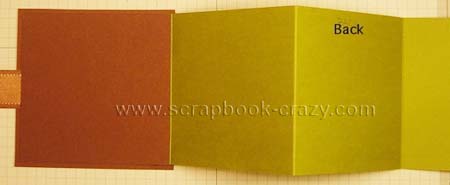
Step 5:Glue the 3 3/4" x 3 3/4" card stock over the ribbon, covering it and the 1/4" strip of the tri-fold center. |
|
|
|
|
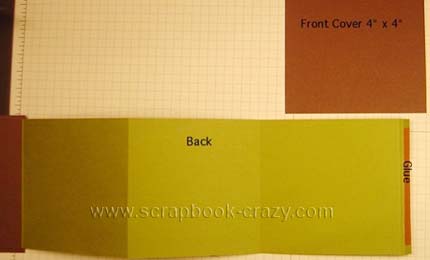
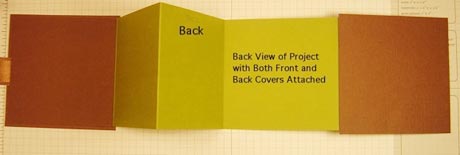
Step 6:Take the other 4" x 4" piece of card stock and attach it to the opposite end of the tri-fold using a piece of sticky strip. This will become the front cover. |
|
|
|
|
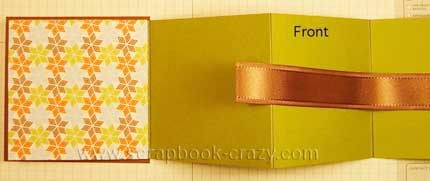
Step 7:Flip the project over and use adhesive to attach the booklet to the inside front cover. NOTE: The entire front page of the booklet will be glued down to the inside front cover of the project. |
|
|
|
|
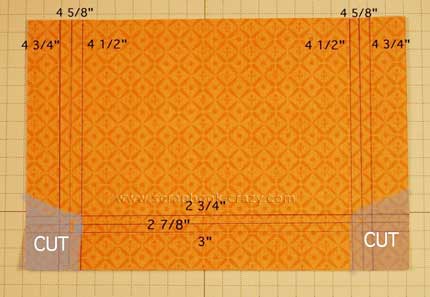
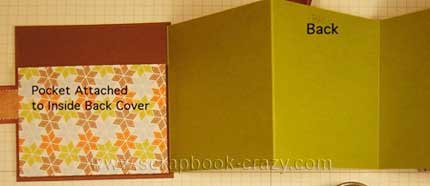
Step 8:Pocket - You will need to score the 3 1/2" x 5 1/4" piece of decorative paper on both sides and on the bottom. Score the sides as follows: 4 1/2"; 4 5/8" and 4 3/4"; turn and do the same to the other side. For the bottom score at 2 3/4"; 2 7/8" and 3". Now fold the three score lines on each end in a zig-zag pattern. Cut away the corners as pictured, angling the cut up from the corners on the sides and straight down on the score line at the bottom. Next fold in the two sides and the bottom and glue together where they meet at the bottom corners. Put adhesive along the back three edges of the pocket and secure it to the lower inside back cover. |
|
|
|
|
|
|
Step 9:Add picture and embellishments then fold up the scrapbook and tie the ribbon in a bow to close. |
|
|


And that is all there is to it. What a great mini album and tutorial. Thanks heaps to our Guest Mini Maker Amy Manhart :) Visit her blog Wuns Upon A Time for more creative ideas and free video tutorials!
Return from How to make a mini scrapbook to mini album ideas