Funky hand bag mini album instructions
You have got to love fashion accessories and a funky new hand bag ranks up there with the best of them. Even those of us girls who may have never experienced the sheer joy of adopting a brand new handbag to love will appreciate this little hand bag mini album, just perfect for carrying our friends and family around in...as opposed to lip gloss, mints and a ton of junk.
Quick Note. Instead of a mini album you can make greeting cards or invitations. Just exclude the page inserts and follow the rest of the directions.
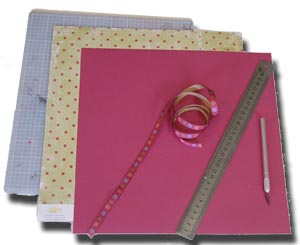
| Supplies -1 sheet of cardstock or patterned card for the album cover -One sheet of card-stock for the inserts -Metal ruler -Cutting tool or craft knife -Length of ribbon -Adhesive (glue or double sided tape) |
 |
Template
If you prefer to use a template you can download this purse mini album template.
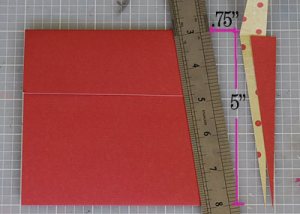
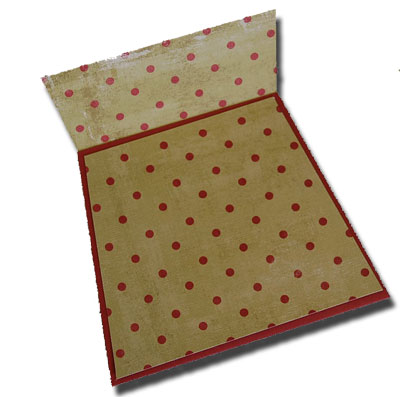
| 1. Take 1 sheet of 12x12 Card you will use for
the album cover. i used a double sided patterned paper so that I can use the
reverse side for the front panel. Cut it in half so that it measures 12" x
6". Score and fold at 5" and 10" along the long side.
|
|
|
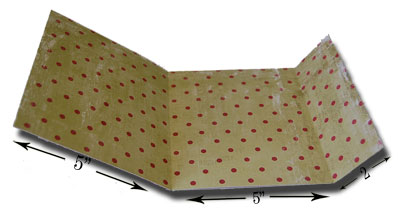
| 2. Fold the album cover and lay it on your cutting mat. Measure .75" in from the top right hand corner and mark with a pencil. Lay your ruler in line with the top mark and the bottom right hand corner. Cut away the excess. |
|
|
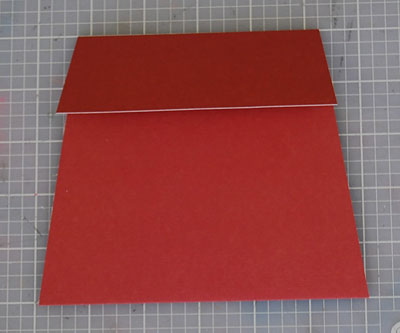
| 3. Repeat step two for the left hand side. Your cover should now resemble this. |
|
Cut the inside pages to measure |
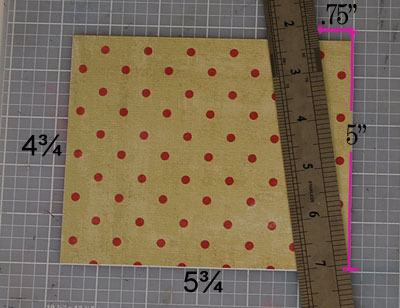
| 4. Cut the front panel from co-ordinating paper
to measure 5¾" x 4¾". As with the album cover you will need to trim off the
excess with a craft knife. Notice in the image below that instead of cutting
to ¾" from the top right hand corner of the paper I have used the
cutting mat to measure ¾" from a point as if the paper 5" high. This is to keep the gradient of the cut the same as the album cover - try cutting on a piece of scrap paper to see the difference. |
|
|
|
|
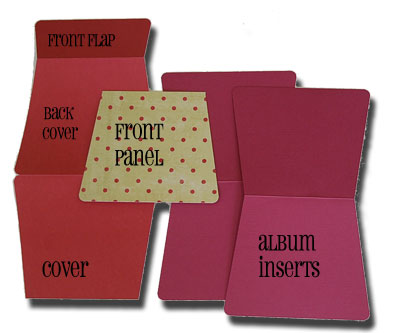
| 5. Cut two page inserts each measuring 5¾" x 9½". Fold them in half. Cut off the excess exactly as you did in step 4 for the front panel being careful to ensure the gradient of the cuts are the same. You should now have 4 pieces to form your album as per the diagram below. I have used my corner punch to give it a nicer rounder look. |
|
" |
| 6. Assembling the album. Punch two small holes along the fold of the album inserts ¾" in from each side. Do the same for the album cover on the fold between the front flap and the back cover. Put your album together with the inserts. Tie a knot at one end of the length of ribbon, thread it up through the inserts and cover and back in again. Tie another knot. All done. |